Showing posts with label Mixer Rating 3. Show all posts

Saturday, April 13, 2013

Spinach Galette with Wild Mushrooms


When ever we have friends over for dinner, I typically spend a day or two pouring over food blogs and websites. I love jumping from blog to blog. One blog will lead me to twenty others. I could (and have) spent hours getting lost in the posts. I found this recipe on Yummy Supper and thought it would be perfect for our vegetarian guests.

I think next time I would add some garlic to the filling mixture to give it that extra little kick. Otherwise, it was a deliciously fresh and light meal that went perfectly with our quinoa salad.


Crust 
1 1/2 cup all purpose flour 
pinch of sea salt
5 tablespoons cold unsalted butter, cubed
6-7 tablespoons ice water


Filling 
12 packed cups spinach leaves
1/2 cup sliced leeks
3 tablespoons olive oil
sea salt
2 cups fresh wild mushrooms (Chanterelles or Hedgehogs are delicious here)
1 cup grated Parmesan
1/4 cup coarsely chopped Italian parsley

Crust 
In a stand mixer bowl, add flour and salt. Attach the flat beater. Turn on briefly to mix. Add cubed butter to the flour mix and mix on speed 5 or 6. Blend until butter is clumped in pea-size bits. As the mixer continues to mix, add the 6 tablespoons of ice water. Turn the mixer off and squeeze the dough with your hand. If the dough sticks together, cracking slightly at its edges it is done. If the dough does not stick together well, add an additional 1-2 tablespoons. The ideal dough just sticks together, is slightly cracked, and rice-sized flecks of butter can be seen sporadically.

Ball up the dough and wrap with plastic wrap. Let sit in the fridge for at least one hour and as long as two days. 

This recipe receives a three whisk rating. When it comes to pastry, it is always easier in the stand mixer. While the mixer was getting the butter down to pea-size bits, I was moving around the kitchen to get the ice water - very helpful and time-saving!


Friday, December 21, 2012

Last Minute Xmas Appi's: Mini Quiches


With some leftover homemade pastry hanging around, I was able to throw these mini quiches together quickly.


Ingredients

About a quarter batch of my pastry recipe
4 slices of cooked bacon, cut in half lengthwise then cut into small pieces
Shredded Tex Mex or Cheddar cheese
4-5 large eggs
a splash of milk 
pepper

Roll out pastry to quite thin. With a circular cookie cutter, cut round pieces of pastry. Tuck into a mini muffin tin allowing the pastry to pucker, but pushing pastry gently to the sides of the cup. 


Drop bacon pieces in the bottom, using up about 2 slices of bacon per 12 quiches made. Top bacon with cheese. Beat eggs, milk, and pepper together. Pour egg mixture into filled cups. 


Bake at 350 degrees Fahrenheit until egg is just hard to the touch, the pastry is just starting to brown and pastry is firm enough to slide around the muffin tin. 

Let cool in tray for about 10 minutes, then transfer to a cooling rack. Let cool completely. Package quiches up in a air tight container and freeze. 

Re-heat in the oven allowing the pastry to brown a little more and the egg to warm to an enjoyable temperature. 


This recipe receives a mixer rating of 3 whips - to make the pastry by hand would be a pain! Much easier to do with the stand mixer. 


Sunday, September 16, 2012

Roasted Sweet Potato and Apple Puree


Mashed sweet potato has grown on me slowly. A staple to Christmas and Thanksgiving menus, I used to take the smallest little dollop in comparison to all the other, much tastier things to be eaten. However, my opinion is changing!

 This recipe brings out the clean taste of delicious sweet potato which meets the complementary soft sweetness of the roasted apple perfectly. It is a super easy dish to prepare with the help of a stand mixer that can quickly puree the roasted potato and apple together! 


Ingredients
2 sweet potatoes
1 gala apple, cored and chopped in two 
2 Tbsp unsalted butter
salt to taste

*Note, these values produce about 2 good servings of mash,  the ratio of sweet potato to apple could be maintained when increasing the dish to accommodate for a larger crowd. 

Preheat the oven at 450 degrees Fahrenheit. Place whole sweet potatoes and halved apple on a baking sheet and bake until very soft (approx. 1 hour). Remove and let cool until cool enough to handle. Remove skins. Place sweet potato and apple in the stand mixer bowl outfitted with the metal whip. Add the butter and salt. Beat on high until sweet potatoes are smooth and only small chunks of apple remain.

Place in an oven safe dish and return to the oven approximately 10 minutes before eating to warm the mix back up to an enjoyable temperature.  


This recipe receives a three whisk rating simply because the stand mixer made it super easy to mash the apples and sweet potato. It saved a good chuck of time and effort to throw everything into the bowl and turn on the mixer while I got the rest of the meal ready to plate. 


Savoury Beef Pie in a Braided Rosemary Pastry


I follow a fabulous blog called Family Feedbag. Tonight I tried a beef pie recipe from Amy's collection. To make it my own I did a rosemary infused pastry crust rather than the walnut crust she presents. This is such a delicious dish and fancy enough that it could easily serve as a fabulous Christmas Eve/ New Years eve dish. 

Ingredients

Pastry
2 Tbsp finely chopped fresh rosemary 

Filling
a splash of olive oil
1 cups onion, diced
2 cloves garlic, minced
1 lb ground beef OR 1 package of Yves Veggie Ground Round 'Beef'
1 tsp ground cumin
1 tsp ground nutmeg
1 tsp ground cinnamon
2 tsp mustard seeds or 1 tsp ground clove
2 tbsp all-purpose flour

Topping
1 egg
1/4 tsp salt


Heat a skillet over medium heat, add olive oil, garlic and onions. Cook until onions are softened. Add ground beef and spices and cook until meat is cooked through. Remove from heat and stir in flour. Let cool. 

To the plain pasty, add chopped rosemary and knead until well-incorporated. Roll out into an elongated oval form. Coat a baking sheet with a small amount of olive oil and lay the rolled out pasty down. Top with the beef mixture, building the beef into a column in the middle of the pastry.  


Along the pastry's edges, cut inch wide strips that run perpendicular to the column of beef. Braid the pastry by first folding up the end, then alternating strips from the left and right sides of the beef, tucking edges into one another. 


The photo below demonstrates the end product of the braiding step. Next, brush the exterior with a beaten egg and top with a small amount of salt. Bake at 400 degrees Fahrenheit for 40 minutes.  


Enjoy with fresh peas and roasted sweet potato and apple puree. 


This recipe gets a three whisk rating due to the pastry.

Tuesday, May 15, 2012

Partridge Berry Pie


Also known as lingonberry, the partridge berry is a small sour berry grows in rich boreal forests and arctic tundra of the Canadian North. In late summer, many Newfoundlanders traverse rocky forests and low lying boggy tundra to harvest the berry. Commonly used in preserves, jams, pies and wine, partridge berry pie is a classic dessert of Newfoundland. I have yet to make this tangy tart myself but certainly enjoy having a taste of it. It is served best alongside vanilla ice cream, creme fraiche or even as I had it tonight, with a dollop of cream cheese flavoured fruit dip. The creamy addition softens the tanginess of the berries a little.

A quick google search produced a trusted recipe from Canadian Living. I suggest making your pie crust by scratch.

In heavy saucepan, combine 2 cups of partridgeberries with 2 cups of sugar. Bring to boil over medium-high heat, stirring, often, until berries burst. This will take about 7 minutes. Using a wooden spoon, mash some of the berries that have yet to burst. Boil for 2 to 3 minutes longer or the filling has thickened slightly. Let cool. The filling can be stored in airtight container in fridge for up to 4 days. 

Fill prepared pie pastry with filling, top with a latticed pastry design. Do so, by rolling out remaining pastry and cutting into 1 inch-wide strips. Moisten rim of pie with water. Weave strips tightly into lattice so strips are touching. Trim off lattice ends at rim; press and crimp to seal.

For a glaze, brush the top of the pie with milk and sprinkle with sugar. 

Bake at 425 degrees Fahrenheit for 20 minutes then reduce to 400 degrees Fahrenheit and bake for another 5 to 10 minutes. Bake until the filling is bubbly and the pastry is golden brown. Let cool a little before serving. (Don't forget that ice cream or creme fraiche!)


If you are planning on making your own pastry, this recipe definitely deserves a three whisk rating. If you prefer to go about your pastry a different way (i.e. Tenderflake) then the rating could be reduced to just one whisk. 


Monday, April 30, 2012

Homemade Mushroom Ravioli


My parents came this weekend for a visit. When they have come to Kingston before, we have often set out to one of the many delicious restaurants in Kingston enjoy in some indulgent local cuisine - Kingston, after all, has some fabulous restaurants. This time however, my husband and I thought we should plan for a dinner at home and wanted to get creative! What resulted was homemade mushroom ravioli in a creamy lemon thyme sauce. The best part of the evening, was preparing this experimental dish with the family! It was a real team effort!

Earlier in the day I tried my hand at making fresh egg pasta:

Fresh Egg Pasta

Ingredients 
600 g of flour
6 large eggs

Making the Dough
1. place flour and eggs in the stand mixer bowl. Attach the flat mixer. Turn the stand mixer on to Speed 2 for approx. 30 seconds or until flour is well mixed with the egg.
2. Turn dough out onto a lightly floured surface and begin kneading by hand. I tried using the dough hook on the stand mixer but it turns out this dough is a little too thick for the poor machine. Luckily your hands are a practical and powerful tool! Just keep punching, stretching, poking, and working the dough until its nice and smooth. When the dough feels very firm and dry, I found it helpful to wet my hands with water and smooth a small amount across the top of the dough to moisturize it before kneading further.
3. Wrap it up very well with plastic wrap and let the dough set for 30 minutes.


Rolling out the Dough
Let me preface this by saying rolling out the dough would be SOOO much easier and better if I had a pasta maker. I read one blog that excitedly encouraged that no good Italian mother ever needed a pasta maker so rolling out pasta by hand can be done! I divided the pasta into 3 smaller balls then basically, I rolled and stretched and rolled some more until the dough was as thin as I thought it could go. Turns out even thinner would have been better. While enjoying the ravioli I noted how thick the pasta really was. The thinner you can get it the better!

Once I had finished rolling out the dough, I wrapped it back up in plastic wrap and put it back in the fridge. I was able to store it this way for about 4 hours.


The Mushroom Ricotta Stuffing 

Ingredients 
600 g of mushrooms - crimini, oyster, porchini mixture  
one small red onion, finely chopped
3 cloves garlic
a good splash of white wine
seasoning to taste - salt, chili pepper flakes
350 g ricotta cheese
fresh thyme 

1. finely chop mushrooms and red onion 
2. Add 1 tbsp of olive oil to a medium pan on medium-high heat. Saute red onion and garlic for 2-3 minutes. 
3. Add chopped mushrooms and saute for 10-15 minutes. The mushrooms will cause the pan to become liquidy at first, your goal is to cook off most of the liquid
3. Add white wine, seasoning cook until white wine has cooked off a little
4. Remove from heat, mix in ricotta cheese and freshly chopped thyme 


Constructing the Ravioli 

Ingredients 
prepared pasta pieces 
prepared mushroom filling 
egg wash - 1 egg and a dash of water combined in a small bowl and beaten 

1. Place one sheet of pasta on a lightly floured surface
2. Using a cookie cutter or fancy ravioli cutter, cut out as many pasta pieces as possible. Two pieces will come together to form one ravioli
3. Take one ravioli piece, place a dollop of mushroom ricotta filling in the middle. With a basting brush, paint the edges of the pasta with the egg wash to assist with sealing
4. Place another ravioli piece on top and pinch the edges closed with a fork 
5. Place on wax paper. To prevent sticking, dust ravioli lightly with flour


Lemon Thyme Cream Sauce 

Ingredients 
3/4 cup heavy cream 
1/2 cup white wine
1/4 cup chopped red onion
fresh chopped thyme and parsley 
1 Tbsp lemon juice 
pepper 

1. Heat about 1/2 Tbsp of oil in a small sauce pan over medium heat and saute red onion for 3-4 minutes or until softened
2. Reduce head and add cream, wine and lemon. Allow sauce to slowly reduce wine by maintaining medium-low heat but preventing rapid simmering or boil 
3. stir in fresh thyme, parsley and pepper. The sauce can either be removed from heat and reheated just in time for the pasta, or kept on the element at a very low temperature to allow for flavours to mix. 

Cooking and Serving the Ravioli 

Ingredients 
prepared ravioli 
water 

1. Bring a large pot of water to a boil
2. Carefully drop in ravioli. Adjust heat to maintain a steady boil (not too aggressive of a boil that it throws the ravioli around too much, running the risk of the ravioli breaking up)
3. We boiled the ravioli until they rose to the surface (approx. 5 minutes) - this is a traditional way of measuring when ravioli are finished. However - because the pasta was so thick, the ravioli really should have been boiled for another 5 minutes or so. So if you roll out your pasta with a pasta maker, you could probably stick to 'boil until floating' approach. If you rolled the pasta out by hand, I would say 10 minutes in the pot would likely do the trick. 
4. Use a straining spoon to transfer ravioli into a pasta strainer. Transfer to a bowl and coat with prepared sauce.
5. Enjoy with a crisp salad and your favourite bottle of wine! 

watching the ravioli boil


I gave this recipe a three whisk rating because the stand mixer definitely did come in handy saving me time and effort kneading the pasta dough. However, if this were a different blog with a different sort of rating I would give it a strong rating in favour of using a pasta roller to get the pasta as thin as possible. I was not very successful doing this by hand. 


Monday, February 20, 2012

Rustic Garlic Mashed Potatoes


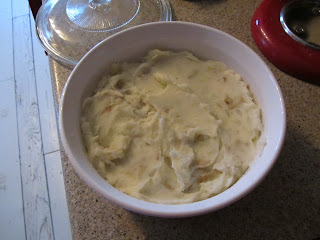
I had a craving for mashed potatoes tonight, but we don't have a masher. So Joey put me up to the challenge: could the stand mixer mash potatoes so as not to cream them but leave them perfectly lumpy yet smooth. The stand mixer pulled through once again. Here's a recipe for deliciously rustic garlic mashed potatoes.

Ingredients 
4 medium sized yellow potatoes, unpeeled and chopped into squares
2 Tbsp butter (approx.)
1/4 cup milk (approx.)
4-5 cloves of garlic
salt and pepper to taste

Steps
1. boil potato squares until quite soft 
2. strain and dump into your stand mixer bowl 
3. attach flat beater
4. add butter and start mixing setting the mixer to 'stir' 
5. add garlic 
6. add milk and continue mixing until at desired consistency. (As I mentioned above, Joey and I like our potatoes just a little lumpy and maintaining the skin on the potatoes adds to the texture. If you prefer  your mashed more whipped, I would suggest peeling your potatoes and turning your mixer on higher)


Recipe in Photos: 

Boiling the potatoes

Potatoes and butter added to the stand mixer bowl. Milk on hand to add as it mixes

The finished product. The meat and veggies were still cooking so I transferred the potatoes to a casserole dish and popped it in the oven to keep warm. 

Suggested fare: serve potatoes with pork chops and pan-seared Brussel spouts served with a wild mushroom gravy. 


What I Learned:

  • Artisan can whip up a mean mashed potato dish. Delicious! (and exactly what we were aiming for)
  • I highly recommend this approach - no need to mash by hand and certainly tops boxed versions
  • Mashed potatoes don't have to be a laborious initiative. The stand mixer simplifies the process and produces a delicious side. 


Given that I do not have a potato masher, and even if I did, it would be a whole lot of extra work to use the masher instead of the stand mixer, I give this recipe a score of three whisks. 


Monday, November 28, 2011

Recipe: Toffee Crunch Squares


I whipped these squares up one afternoon for a get-together that following evening. They are as tasty as they are easy to make.

Ingredients  

1/2 cup softened butter or margarine
1 cup packed brown sugar
2 eggs
2 cups flour
1 tsp baking powder
1/2 tsp baking soda
1/4 tsp salt
1 bag (200g) Chipits Skor Toffee Bits
1 cup chocolate chips (optional)

Directions
  1. Attach the flat beater to the stand mixer. In the stand mixer bowl add butter, brown sugar and eggs. Attach bowl to mixer and beat on Speed 4 until well blended
  2. Add two cups of flour,baking soda and powder then mix on Speed 4 until well mixed. Lesson of the day: Be sure to put your plastic guard over your bowl or else you will have an cloud of flour!
  3. Mix in the 1 cup of Skor bits and/or chocolate chips. For my recipe, I did not include chocolate chips
  4. Spread evenly in a greased 13x9 inch baking dish
  5. Bake at 350 degrees F for 23-28 minutes until golden brown
  6. Remove from oven and immediately sprinkle with the remaining Skor Bits 
  7. Let cool then cut into squares 
  8. Stores well in a sealed container for 5-7 days 
Recipe in Photos: 

The batter with chips mixed in - a very sticky consistency

After baking with remaining bits sprinkled on top

Lesson of the day: Notice the shield over the the bowl. This was placed on AFTER making the mess!

This recipe felt super quick and easy to pull off thanks to the stand mixer. A 2.5 rating might be more appropriate because I think this recipe could be easily accomplished using other approaches. Nevertheless, the stand mixer came in handy when I was looking to whip these up real quick for the afternoon get together I took them to. 


Sunday, October 30, 2011

Recipe: Halloween Rolo Cupcakes


Happy Halloween!!


To celebrate one of my favourite 'holidays' I made cupcakes! I am always amazed at the incredible decorating some people are able to do on cupcakes. I, on the other hand, am an amateur. Nevertheless, these cupcakes are festive and pretty darn delicious. Inspired by candy - after all it is halloween - a Rolo spider sits atop these toffee filled chocolate cupcakes. 

Ingredients 

Cupcakes: 
3/4 cup milk
2 tsp lemon juice
1/2 cup butter, softened
3/4 cup granulated sugar
1 egg
1 tsp vanilla
1 cup all-purpose flour
1/4 cup cocoa powder
1/2 tsp baking powder
1/2 tsp baking soda
1 pinch salt
about 1/2 cup of toffee chips (to be honest, I just poured)

Icing:
1/2 cup butter, softened

3 cups icing sugar
3 Tbsp whipping cream
1 tsp vanilla

Directions

Cupcakes
  1. Line muffin cups with paper liners
  2. In a small bowl, combine milk and lemon. Set aside 
  3. Attach the flat beater to stand mixer. In the stand mixer bowl, add butter and sugar. Beat on Speed 6 until fluffy. Beat in egg and vanilla. 
  4. In a medium bowl, mix together flour, cocoa, baking powder, baking soda and salt.
  5. With the stand mixer speed set at 4, add half of the flour mixture then the milk mixture, then the remaining flour mixture.
  6. Add in toffee chips
  7. Scoop into prepared muffin cups, until cups are about 3/4 full 
  8. Bake in the centre of the oven at 375 degrees fahrenheit for 15-20 minutes or until the cupcakes pass the toothpick test.
  9. Remove from muffin tin and place on a cooling rack 


Icing 

  1. Attach the wire beater to stand mixer. 
  2. Cream butter on speed 6, slowly add icing sugar
  3. Add milk and vanilla 
  4. Cream until smooth, revving your stand mixer up to the highest speed for smoothness
  5. To decorate as I did, set aside 1/8 cup of icing to be coloured brown, and 1/4 cup of icing to remain white, colour the remaining orange. With a butter knife, spread orange icing over the top of the cupcake. Using a piping bag, pipe on white web. Press Rolo's into icing. Using a separate piping bag, pipe on brown legs for the Rolo spider (Rolo piece is the body of the spider, icing is the legs)


Beaten butter mixture

After combining flour, butter and milk mixtures

Ready for the oven

After the oven

Set out to cool 


Spiders on a web!


What I Learned:
  • While detailed cupcake decorating can be an expensive endeavour - fancy food colourings, piping bags, tips etc. - it can be made economical as long as you are satisfied with a cupcake that isn't exactly magazine ready. Instead of investing in piping bags and tips, I cut a very small edge off of the corner of a ziploc bag which seemed to work just fine. 
  • The toffee chips melt into the batter upon baking which adds to the moistness of the cupcake. Delicious! 
  • Dont add too much food colouring to your icing. It will start to separate and that looks gross. If this happens simply add more icing sugar. 

I played around a lot with the icing - adding icing sugar here and there. It was definitely a big help to have my hands free as the stand mixer whipped the icing up and I was debating about how much sugar to add next!